Once you figure out how to start a sourdough starter, you can make all sorts of bread recipes. If you’re looking for bread recipes that won’t need yeast (or uses less yeast), then a sourdough starter is an easy thing to keep around for just that! All you need is a clean glass jar, whole wheat flour to start, all purpose flour to feed, warm non-chlorinated water, and a coffee filter or paper towel to cover your jar.
Why start a sourdough starter?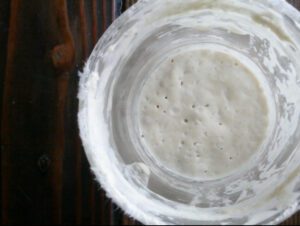
If you’ve used yeast to bake bread before, then you know that it is hardier and can be stored by itself with little to no maintenance. We keep opened bags in our fridge then I have some vacuum sealed bags for longer term storage. This is to ensure the yeast stays alive. But if left open too long or if using an expired bag, then the bacteria that makes the yeast alive can die off.
With sourdough, you’re using the naturally occurring yeast within your flour. Since you’re leaving it out on the counter to allow it to ferment, people also claim that this makes it healthier for you. But the biggest plus for us is that I’m not worried about my yeast. Nothing is worse than going to make no knead bread, mixing the water and yeast…then nothing. No bubbles means no live yeast. No live yeast means no bread for us that day. Having a sourdough starter though eliminates that worry. I just pull it out of my fridge the night before, feed it, then it’s bubbly and active the next day!
How to Start a Sourdough Starter
This process takes a couple days because, as I mentioned before, fermentation is occurring. But you only need a couple things before you’re on your way to having a live, bubbly starter. We have a kitchen scale, so I measure out my flour and water that way, but I know many go by the texture their starter when they’re “feeding” it.
-
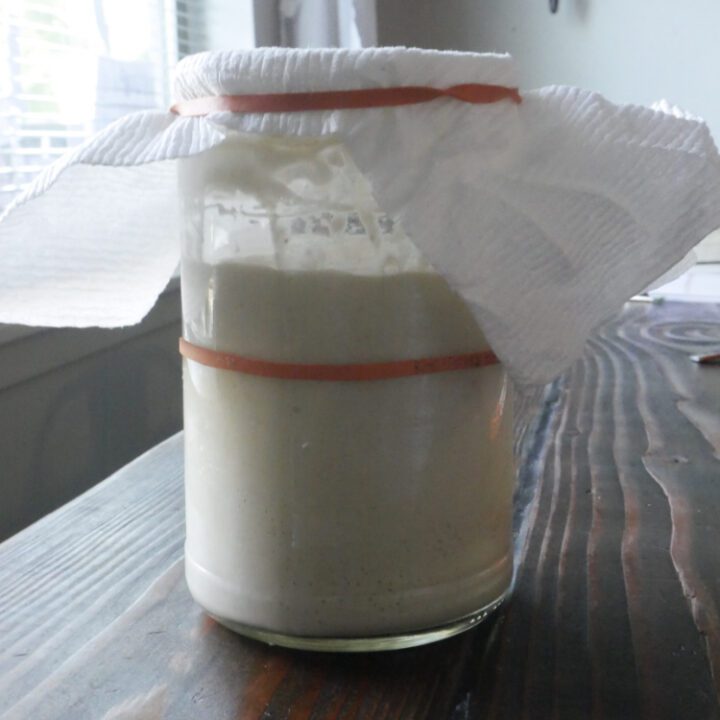
How to Start a Sourdough Starter
Yield: 1 starterSourdough starters use the naturally ocurring yeast in your flour to make breads and bread products. These are easy instructions on how to make a sourdough starter so you can begin your sourdough journey today!
Materials
- Whole Wheat Flour, preferably organic
- All Purpose Flour, preferably organic
- Non-Chlorinated Water
Tools
- wooden spoon
- glass jar (to store your starter in)
- paper towel or coffee filter
- rubberband
Instructions
- Day 1: Put 4 oz (1 cup) of whole wheat flour and 4 oz (½ cup) of warm (not hot), non-chlorinated water together in your jar. Use a wooden or silicone spoon to mix it together.
- Cover with coffee filter or paper towel then place a rubber band to secure it over your jar.
- Let your starter sit, preferably in a room that is 75-80*f.
- Day 2: After 24 hours, your starter might not have done much (that's okay!) You need to keep about 5 oz (roughly ⅔ cup) then discard the rest. Using all purpose flour, mix 4 oz (1 cup) flour to 4 oz (½ cup) non-chlorinated water. Then add your 5 oz of starter.
- Cover and let site for another 24 hours in a room that is 65-80* (Top of the fridge is usually a good place for us overnight or around the stove if I'm cooking.)
- Day 3: You should see some bubbles! Now, keep 4oz (½ cup) of your starter, then add your 4 0z (1 cup) flour and 4 oz (½ cup) water. Cover and let sit for another 24 hours in a warm place.
- Day 4-6: Your starter will probably get the "sour" aroma to it and you'll notice it growing more after you feed it. Continue with your 4 oz starter, flour, and water combo to keep it going. You can keep using your discards too.
- Day 7+: At this point you should definitely see a difference. You'll notice bubbles and smell that sweet aroma that gives sour dough it's name! Before you use it, feed it the same as you have been. You should notice it rise. Then, begin using in your favorite sourdough recipes.
Notes
- If you see liquid form at the top, stir it in then just add a hair more flour the next feed. This is called hooch and is a by product of your sourdough fermentation process. I've only noticed it when I use a little too much water.
- Be sure to use non-chlorinated water as this can kill your yeast.
- I prefer to use organic flour for my sourdough starter to help ensure my starter will start.
-
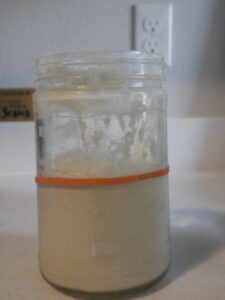
at the time of feed 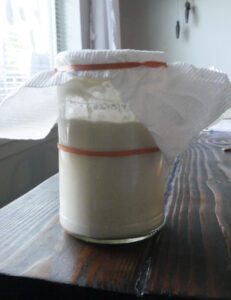
1 hour after feed
Notes About Your Starter
- With your day 3 discard, you could make something that doesn’t need a lot of rise. Crackers, tortillas, or pancakes are all ideas!
- A colder room will cause your starter to not be as active and take longer to get going.
- Gonna be gone for awhile or won’t need your starter for a couple days or more? Place it covered with your coffee filter or paper towel in your fridge. When you need to use it, pull it out of your fridge at least 8 hours beforehand (preferably pull it out the night before), feed it, then watch it rise!
- If a dark watery substance forms on top, mix it in. This is created in the process and called “hooch” but try to add a hair more flour to your mixture. Consistently having more and more hooch will kill your starter and give it a horrible smell (from my experience)
- Wanting multiple starters to ensure your chance of success? Or wanting to gift it? Feel free to use your discard to make another starter.
- Still having trouble? You might find this post about sourdough troubleshooting helpful from Cultures for Health.

How to Start a Sourdough Starter
Sourdough starters use the naturally ocurring yeast in your flour to make breads and bread products. These are easy instructions on how to make a sourdough starter so you can begin your sourdough journey today!
Materials
- Whole Wheat Flour, preferably organic
- All Purpose Flour, preferably organic
- Non-Chlorinated Water
Tools
- wooden spoon
- glass jar (to store your starter in)
- paper towel or coffee filter
- rubberband
Instructions
- Day 1: Put 4 oz (1 cup) of whole wheat flour and 4 oz (½ cup) of warm (not hot), non-chlorinated water together in your jar. Use a wooden or silicone spoon to mix it together.
- Cover with coffee filter or paper towel then place a rubber band to secure it over your jar.
- Let your starter sit, preferably in a room that is 75-80*f.
- Day 2: After 24 hours, your starter might not have done much (that's okay!) You need to keep about 5 oz (roughly ⅔ cup) then discard the rest. Using all purpose flour, mix 4 oz (1 cup) flour to 4 oz (½ cup) non-chlorinated water. Then add your 5 oz of starter.
- Cover and let site for another 24 hours in a room that is 65-80* (Top of the fridge is usually a good place for us overnight or around the stove if I'm cooking.)
- Day 3: You should see some bubbles! Now, keep 4oz (½ cup) of your starter, then add your 4 0z (1 cup) flour and 4 oz (½ cup) water. Cover and let sit for another 24 hours in a warm place.
- Day 4-6: Your starter will probably get the "sour" aroma to it and you'll notice it growing more after you feed it. Continue with your 4 oz starter, flour, and water combo to keep it going. You can keep using your discards too.
- Day 7+: At this point you should definitely see a difference. You'll notice bubbles and smell that sweet aroma that gives sour dough it's name! Before you use it, feed it the same as you have been. You should notice it rise. Then, begin using in your favorite sourdough recipes.
Notes
- If you see liquid form at the top, stir it in then just add a hair more flour the next feed. This is called hooch and is a by product of your sourdough fermentation process. I've only noticed it when I use a little too much water.
- Be sure to use non-chlorinated water as this can kill your yeast.
- I prefer to use organic flour for my sourdough starter to help ensure my starter will start.

Leave a Reply