
Homemade Sourdough Bagels with Fresh Milled Flour (Overnight Recipe)
There’s nothing quite like the chewy, golden perfection of a homemade sourdough bagel, especially when it’s made with fresh milled flour. I’ve been baking with fresh milled flour and making sourdough bagels for a few years now, and bringing the two together has been a total game changer. Even my biggest recipe critics (my husband and kids) approve of these! Using freshly milled grains not only gives these bagels incredible flavor and texture but also boosts the nutritional benefits that come from true sourdough fermentation.

These sourdough bagels are made with 100% fresh milled flour and a long, slow ferment for maximum flavor, digestibility, and health benefits. Whether you’re an experienced sourdough baker or just getting started, this step-by-step guide will walk you through everything you need to make bakery-quality bagels at home. Plus I include helpful tips and answers to common questions along the way.
This recipe is nice because you can prep your sourdough bagel dough, create your shaped bagels, then allow them to sit overnight while you sleep. The next morning, all you need to do is boil your bagels then bake your boiled bagels to a light golden brown.
Why Fresh-Milled Flour and Sourdough?
Benefits of Fresh-Milled Flour
Fresh-milled flour comes straight from whole grains, ground in your own kitchen. Using it in your bagels gives you:
- Maximum nutrition: All the bran, germ, and endosperm are intact, preserving fiber, vitamins, and minerals.
- Richer flavor: The nutty, slightly sweet taste enhances the natural flavor of your bagels.
- Better digestibility: Milling at home preserves enzymes that help break down starches and proteins.
Benefits of Sourdough Fermentation
Sourdough isn’t just about flavor — it’s also easier on digestion:
- Pre-digests gluten and phytic acid, making the bagels gentler on the gut and thyroid (especially helpful for Hashimoto’s).
- Natural leavening creates a chewy, resilient texture and a slightly tangy taste.
- Long fermentation improves flavor and shelf life, giving your bagels that iconic New York chew without additives.
Ready to start your own sourdough? Click here to learn how!
Yeast Bagels vs. Sourdough Bagels
When it comes to making bagels, you can choose between a quick yeast-based dough or a naturally fermented sourdough starter. Yeast bagels are beginner-friendly, rise quickly (usually within a few hours), and have a mild, classic flavor. They’re perfect if you want fresh bagels the same day.
On the other hand, sourdough bagels require a longer fermentation period, often with an overnight rise in the fridge, but reward you with a tangy depth of flavor, improved digestibility, and a pleasantly chewy texture. Sourdough also tends to extend shelf life, keeping your bagels fresher for longer. The choice really depends on your schedule and taste preference—yeast bagels for convenience, or sourdough bagels for rich flavor and tradition.

Tools You’ll Need
To make perfect sourdough bagels, gather the following:
- Large mixing bowl or stand mixer with dough hook
- Kitchen scale for precise ingredient measurement
- Sheet pan lined with parchment paper or silicone mat
- Large pot for boiling water
- Slotted spoon for transferring bagels to water bath
- Wire rack for cooling
- Optional: egg wash brush and plastic wrap for resting dough
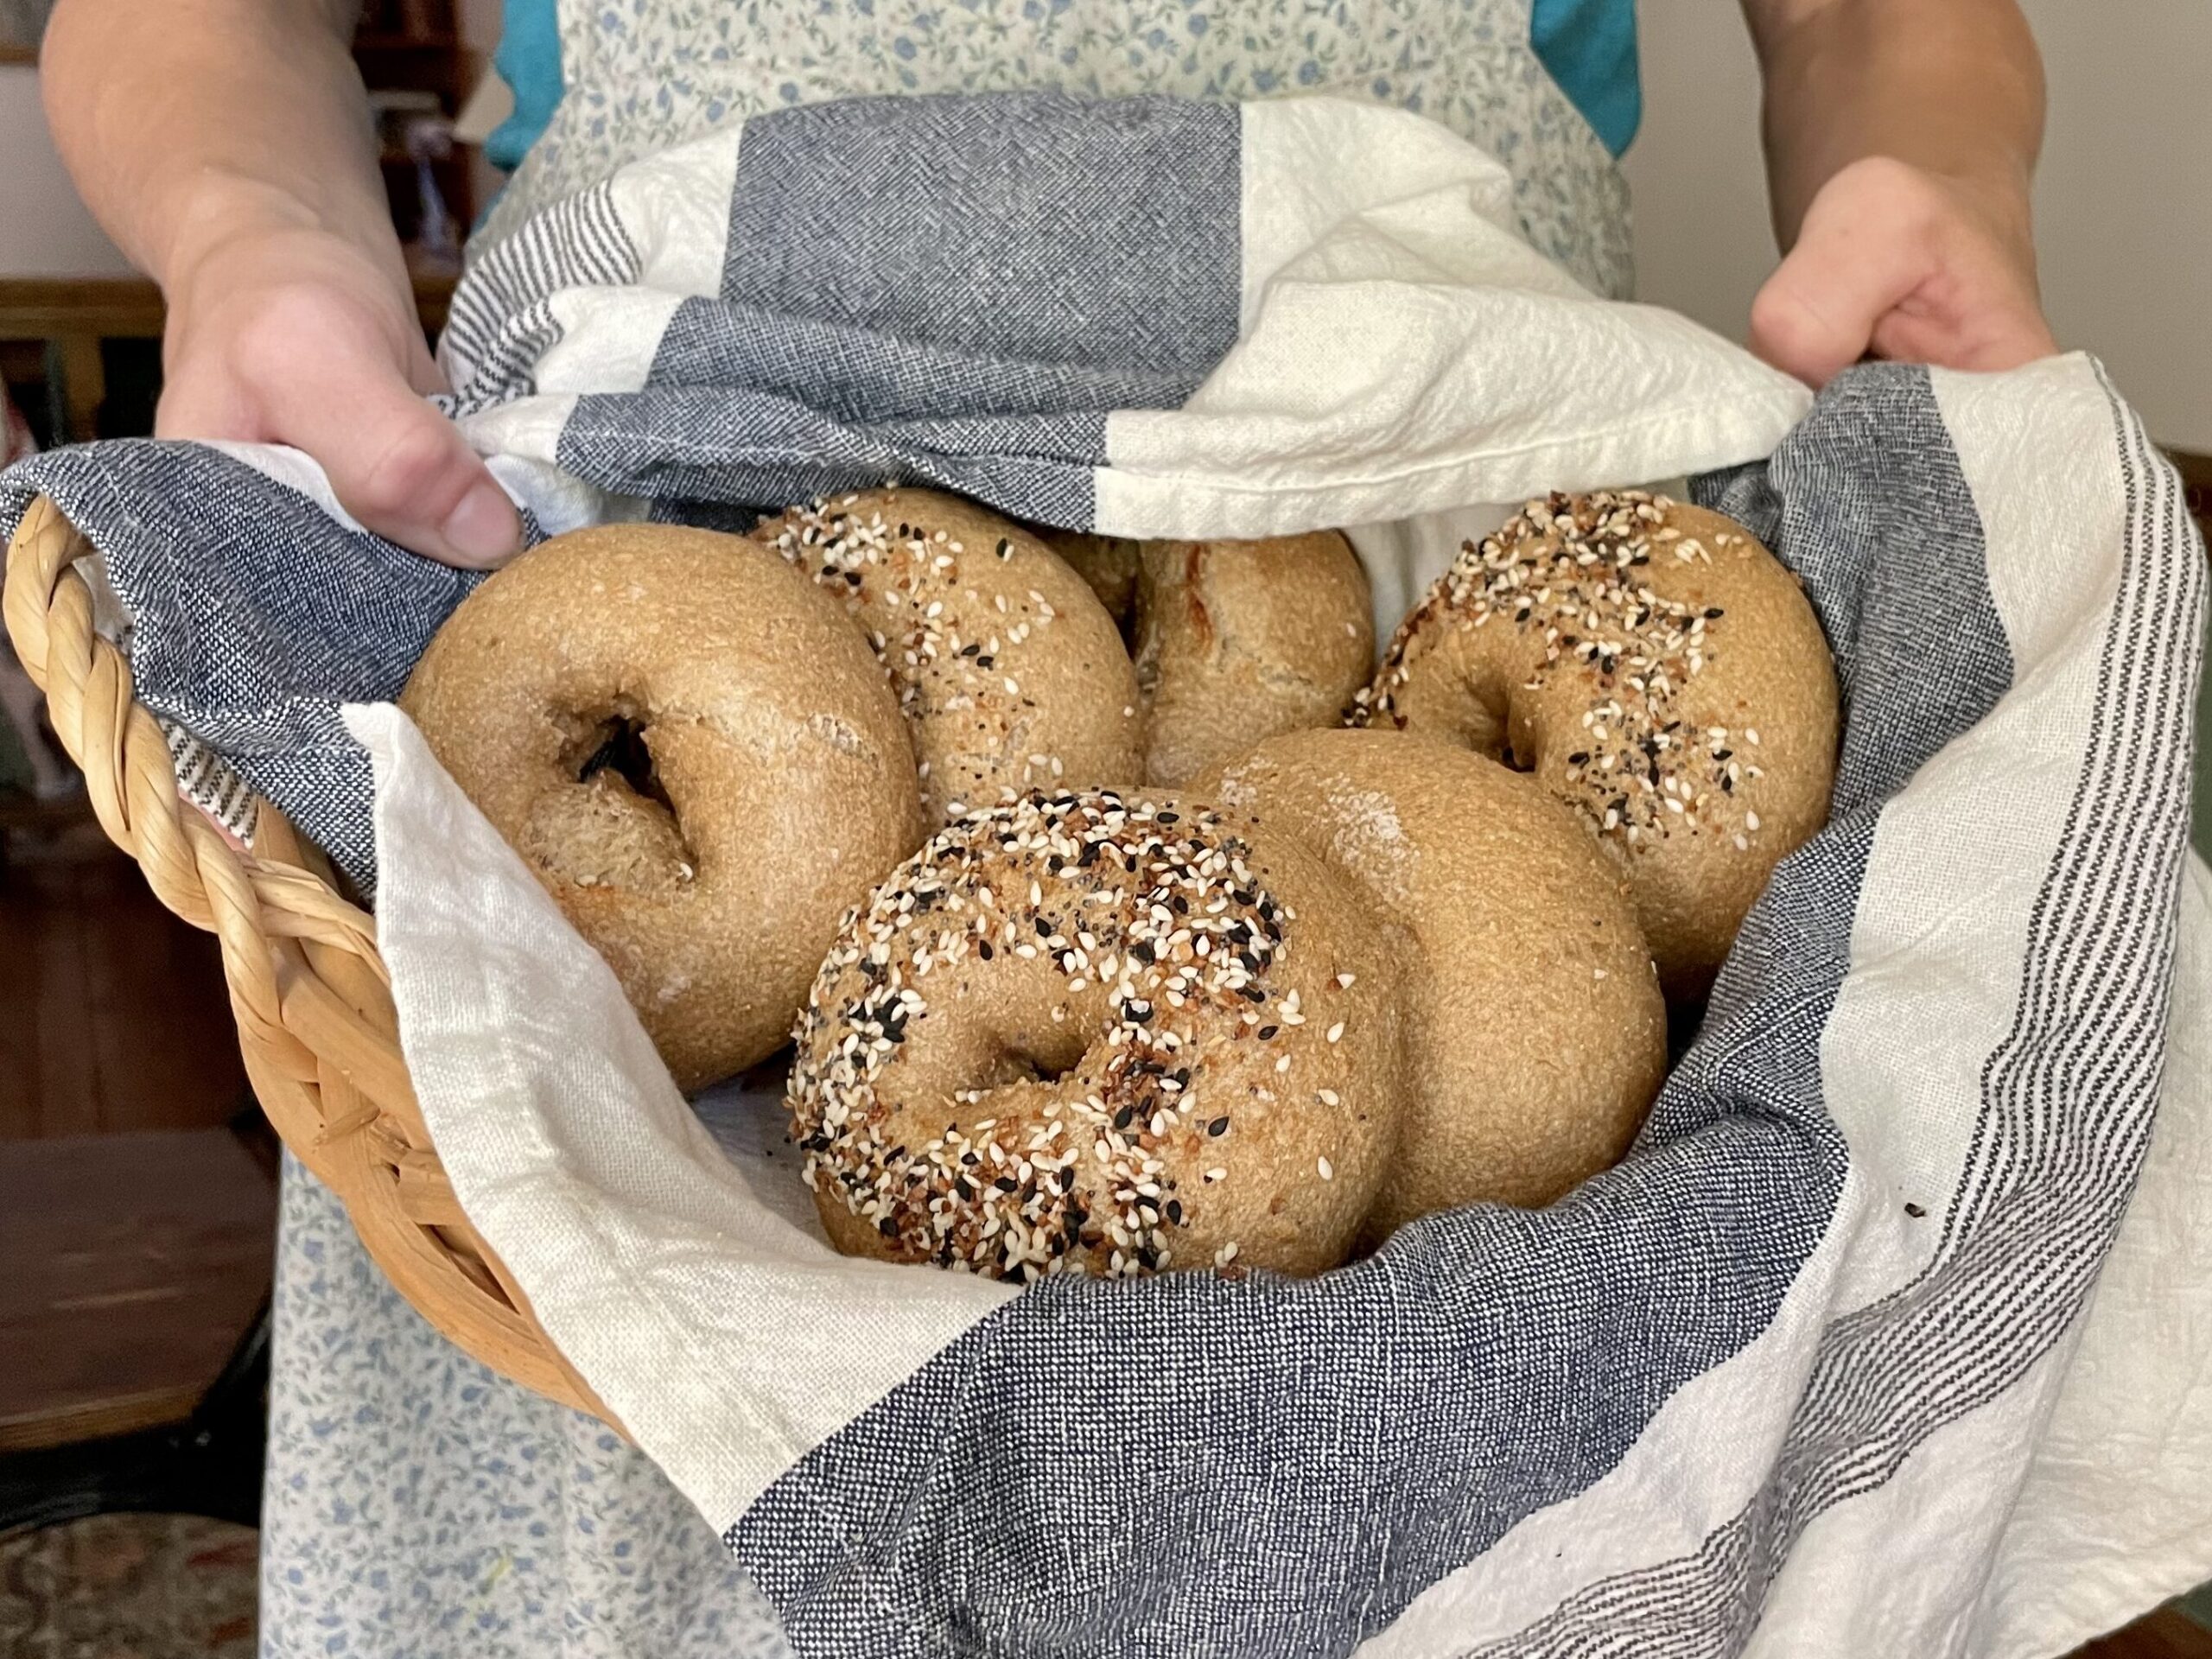
Fresh-Milled Sourdough Bagels (NY-style chew, deep flavor)
Yield: 10–12 bagels
Timing: Start to finish = about 24 hrs (includes overnight cold ferment)
Ingredients
Dough:
- 6 ½ cups (780 g) fresh-milled hard white or hard red wheat flour (sifted once if you want slightly lighter texture; keep all for true 100% whole grain)
- 1 ¾ cups + 2 Tbsp (425 g) water, lukewarm
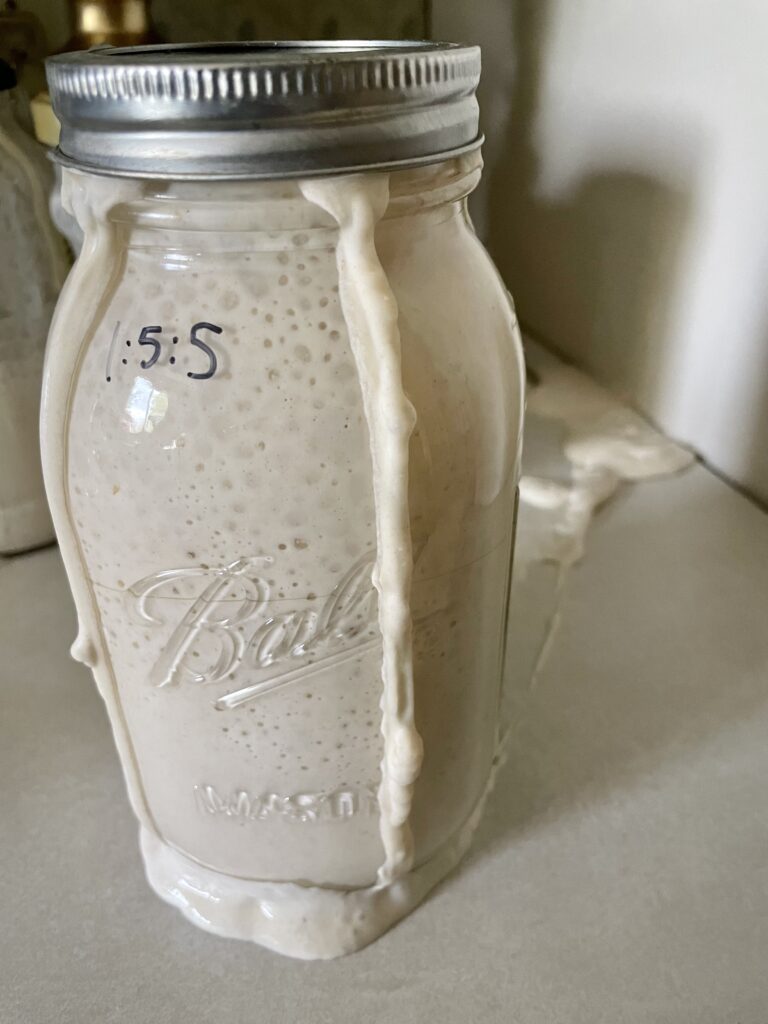
- 1 cup (227 g) ripe sourdough starter (100% hydration, fed with fresh-milled wheat for best results)
- 3 Tbsp (63 g) honey (or barley malt syrup for classic bagel flavor)
- 1 Tbsp (18 g) fine sea salt
Water bath:
- 2 quarts (2000 g) water
- 1 Tbsp (21 g) honey (or malt syrup)
- ½ tsp (3 g) salt
- (optional) 1 tsp baking soda → extra shine/chew
Topping (optional):
- Everything bagel seasoning, sesame seeds, or poppy seeds
Method:- Autolyse (60 min or up to 2 hrs)
- Mix fresh-milled flour + water only. Cover with a light towel, plastic wrap, or beeswax wrap. Let the dough rest to hydrate the bran fully.
- Mix with starter & salt
- In a stand mixer or large bowl, add ripe 100% hydration starter + salt + honey. Knead with dough hook or hands until elastic.
- Bulk ferment (room temp, 4–6 hrs)
- Let rise at ~75°F until slightly puffy at room temperature
- Cold ferment (8–16 hrs)
- Using a butter knife or bench scraper, cut your dough into equal pieces.
- Form a ball then press your finger through the center of each ball to make the center hole.
- Place on parchment, cover lightly with a wet tea towel, and refrigerate overnight.
- This is the true long fermentation. Can even do up to 24 hrs — longer = more digestibility and flavor.
- Boil & bake
- Preheat oven to 450°F (232°C).
- Bring water bath to a boil, add honey and salt (plus baking soda if using).
- Drop bagels in boiling water, with the bottom side up first. Boil bagels for 30–45 seconds per side (shorter boil = softer, longer boil = chewier).
- Remove with slotted spoon, drain, and place back on a prepared baking sheet covered with parchment paper
- Sprinkle with toppings immediately.
- Bake at 450 for 18-22 min, or until a light golden brown. If you allow your bagels to get to a deep golden brown, they will be hard to cut open the next day if you have any leftovers.
- Long, cold ferment = best. Even 12+ hours in the fridge allows sourdough cultures to partially break down gluten and phytic acid.
- Use hard white wheat rather than red for a milder flavor and easier digestion.
- No shortcuts: skipping the cold ferment reduces digestibility and flavor.
- Autolyse (60 min or up to 2 hrs)
FAQs
Q: Can I use all-purpose flour instead of fresh-milled?
A: Yes, but fresh-milled gives superior flavor, nutrition, and digestibility. All-purpose will work but the bagels will be lighter and less nutty.
Q: Can I use King Arthur Bread Flour instead of fresh-milled flour?
A: Yes! King Arthur Bread Flour works well and will give you a strong, chewy bagel texture. Keep in mind that fresh-milled flour adds more nutty flavor and extra nutrition, but if you don’t have a mill, bread flour is an excellent substitute. You may need slightly less water, since bread flour absorbs less than freshly milled whole grain.
Q: How do I know my sourdough starter is ready?
A: It should double in size within 4–6 hours of feeding at a 1:1:1, have a bubbly texture, and a pleasantly tangy aroma. If you use a higher water and flour ratio, such as 1:4:4, it will take your starter longer to get bubbly.
Q: Why do I have to boil bagels before baking?
A: Boiling sets the crust and gives bagels their signature chewy bite. The baking soda or malt syrup in the water helps with color and flavor. Without boiling, you’d end up with a round bread roll instead of a bagel.
Q: Do I need to add vital wheat gluten to my fresh-milled flour bagels?
A: Not always. If you’re using hard red or hard white wheat, the gluten content is usually strong enough for bagels. If you notice your dough tearing easily or not holding its shape, adding 1–2 tablespoons of vital wheat gluten can help boost structure and chewiness.
Q: Why are my bagels too dense or heavy?
A: A few possible reasons:
- Not enough kneading to develop gluten.
- Too short of a rise (bagels need time to puff slightly before boiling).
- Using soft wheat instead of hard wheat (hard wheat is better for bagels).
- Skipping an overnight fermentation — which helps lighten the texture.

Tips for Best Results
- Use hard wheat for maximum chew and structure.
- Avoid overhydrating; fresh-milled flour absorbs more water than store-bought flour.
- The cold overnight ferment is key for flavor, texture, and digestibility.
- Boiling 30–45 seconds gives a slightly softer crust; longer = chewier.
- Experiment with toppings — everything bagel seasoning is classic, but sesame or poppy seeds work beautifully too.
How to Store and Freeze Bagels
To store your bagels, allow the bagels to completely cool. Place in an air tight container for up to 1 week. Putting your cooked bagels in the fridge can dry them out faster.
To freeze your bagels, allow them to cool completely. Then, wrap individually in plastic wrap and place in a freezer safe bag. Make sure to suck the air out of the bag to help prevent the bagels from getting freezer burnt. This can be done by placing the bagels in the bag, zipping the bag from each side and leaving a small gap in the middle. Then, place a straw into the gap, suck the air out of the bag. Once he bag is tight around the bagels, continue sucking the air out as you pull the straw out and finish zipping the bag closed.

Sourdough Bagels with Fresh Milled Flour Recipe

Ingredients
Dough Ingredients
- 6 ½ cups (780 g) fresh-milled hard white or hard red wheat flour (sifted once if you want slightly lighter texture; keep all for true 100% whole grain)
- 1 ¾ cups + 2 Tbsp (425 g) water, lukewarm
- 1 cup (227 g) ripe sourdough starter (100% hydration, fed with fresh-milled wheat for best results)
- 3 Tbsp (63 g) honey
- 1 Tbsp (18 g) fine sea salt
- Optional toppings: Everything bagel seasoning, poppy seeds, sesame seeds
Water Bath
- 2 quarts water
- 1 Tbsp (21 g) honey or sugar
- ½ tsp (3 g) salt
- (optional) 1 tsp baking soda → extra shine/chew
Instructions
- Mix fresh-milled flour + water only. Cover with a light towel, plastic wrap, or beeswax wrap. Let the dough rest to hydrate the bran fully. It will be very dry looking.
- In a stand mixer or large bowl, add ripe 100% hydration starter + salt + honey. Knead with dough hook or hands until elastic.
- Cover and allow to rest at room temperature (mid 70s) for 4-6 hours.
- Place dough on unfloured surface.
- Using a butter knife or bench scraper, cut your dough into equal pieces.
- Form a ball then press your finger through the center of each ball to make the center hole.
- Place on parchment, cover lightly with a wet tea towel, and refrigerate overnight (or up to 24 hours).
- The next morning, preheat oven to 450°F.
- In a pot, place water bath ingredients and bring to a boil.
- Drop bagels in boiling water, with the bottom side up first.
- Boil bagels for 30–45 seconds per side (shorter boil = softer, longer boil = chewier)
- Remove with slotted spoon, drain, and place back on a prepared baking sheet covered with parchment paper.
- Immediately sprinkle with toppings.
- Bake at 450 for 18-22 min, or until a light golden brown.
- Allow to cool then slice.
Notes
- If you allow your bagels to get a deep golden brown, they maybe diffulcult to cut the next day as leftovers.
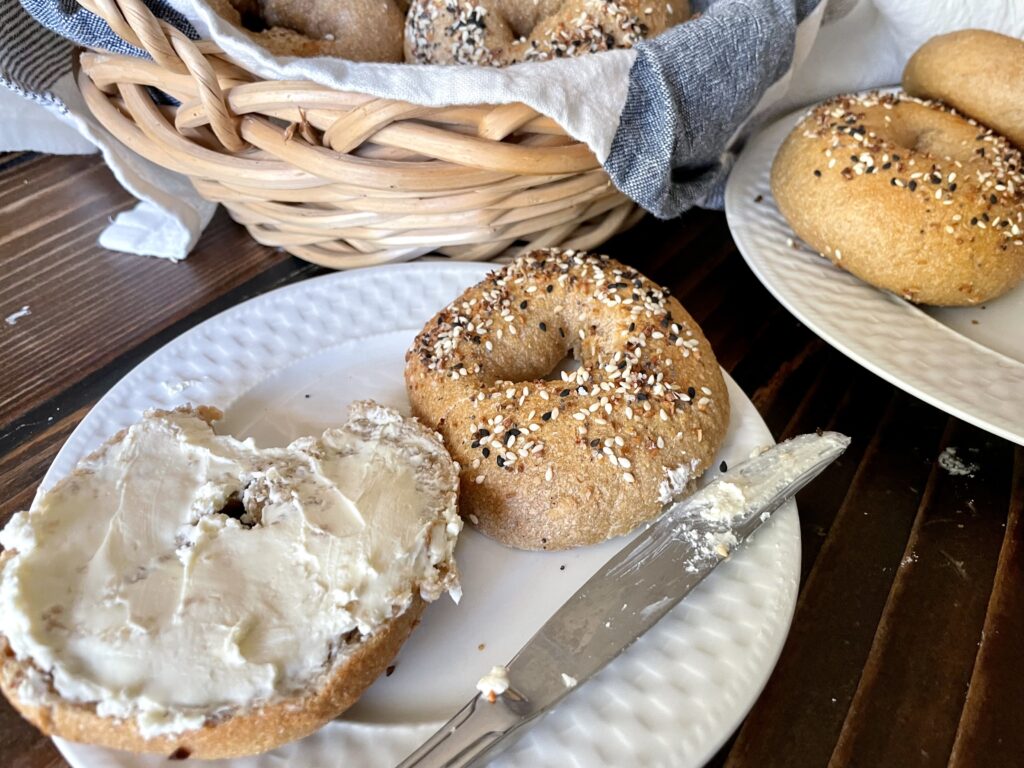
Your homemade sourdough bagels with fresh-milled flour are now ready to enjoy! Serve with cream cheese, smoked salmon, or your favorite toppings for a bakery-quality breakfast or snack right at home.


These look so good! And delicious sounds amazing. Can’t wait to try these.
I haven’t tried making sourdough bagels yet, and this looks like a great first recipe!
These look easy enough for me to make, thank you for the recipe!
This looks so good! Ive struggled with bagels in the past but youve made it look so simple. I’m definitely trying this out 😊
Yum! Such a delicious and wholesome recipe!
I’ve made these twice and they turn out great!
That’s so good to hear! Thank you for sharing 🙂